

 |
| The Dell Wyse 3040 thin client |
So there have been a lot of people messing with these dinky little computers and I'm certainly not the first or the most ground breaking. However I have found that a lot of the info I am after is spread quite widely and is often not the most clear or informative. So this will hopefully be the first in a series of posts about how to mess with these boxes reliably.
Introduction
My overall plan
I should start by stating the end-goal I want to achieve with these boxes (yours is likely different). Basically I'd like to make a "more capable" wireless router or Internet gateway based on something like OpenWRT. This is mainly because I'm irritated by the general state of all-in-one wireless routers with respect to their hardware capabilities and functionality when running open source software.
For example, I have a fairly beefy Linksys router (well, it was beefy a while ago - not so much nowadays), but it still only has a 1.2GHz dual-core ARM CPU with 256M of DDR3 RAM and 128M of flash. Comparatively the 3040 has a 1.44GHz dual-core Atom CPU with 2G of ram and 8G of flash.
Similarly, another router I have is more capable hardware-wise, but needs its proprietary OS in order to be able to use its 5GHz WiFi device (I can only use the 2.4GHz WiFi using OpenWRT on this hardware).
The 3040 doesn't have any inbuilt WiFi capabilities, though. There is an internal M.2 slot that can take a special SDIO-only WiFi card, but I doubt this would be very performant. These M.2 SDIO cards are pretty rare and there's an externally identical card that doesn't have the SDIO interface, so I'm just not going to bother with that. As the 3040 has a single USB3 port, I'll use one of these new-ish Comfast CF-955AX WiFi 6 adaptors, which are supported in the later Linux kernels.
 |
| Comfast CF-955AX |
Where'd I get them?
A local government IT auction house was unloading batches of 4 of these thin clients for about A$40/ea with power supplies. I'd always been enamored with the design of these things (Being the tiniest in a line of similarly-designed Optiplex computers). So I decided to pull the trigger on a lot and worry about how useful they could be after the fact. As it turns out, they're quite capable (more than any thin client I'd fiddled with before at least), but with a few little niggles along the way.
Caveat #1: Power
There are about 3 hardware configuration variables with two options each for the 3040: Ram (8G or 16G), WiFi card present or not, and power requirements (5v/3A or 12v/2A). The power is the riskiest option. The 3040s I received all said they were 12v/2A on their compliance labels, but came with 5v/3A wall-wart power supplies. These worked fine, however there are some reports online that plugging a 12v PSU into a 5v 3040 will kill it. Watch where you step!
The process
Step 1: Get into the BIOS
These thin clients come pre-installed with the Wyse "ThinLinux" OS intended for being only a Windows Terminal Server client.
 |
| ThinLinux |
We need to reboot into the BIOS environment. By default the 3040 usually has a BOIS password set. While I found online suggestions that this could be either "admin" or "Fireport", neither worked for me. I've also seen a suggestion that tapping "G" at boot can factory-reset the BIOS (I haven't tried this, so YMMV). The way I did it was to get a medium-sized flat head screwdriver (or similar) and use it to easily pry-open the bottom cover using the single access slot near the power connector. Be careful as there are several ground shield pads around the external ports and a thermal transfer pad over the back of the CPU area that all may have come loose. On the PCB are two reset buttons. The one we want is near the battery and is labeled "PWCLR".
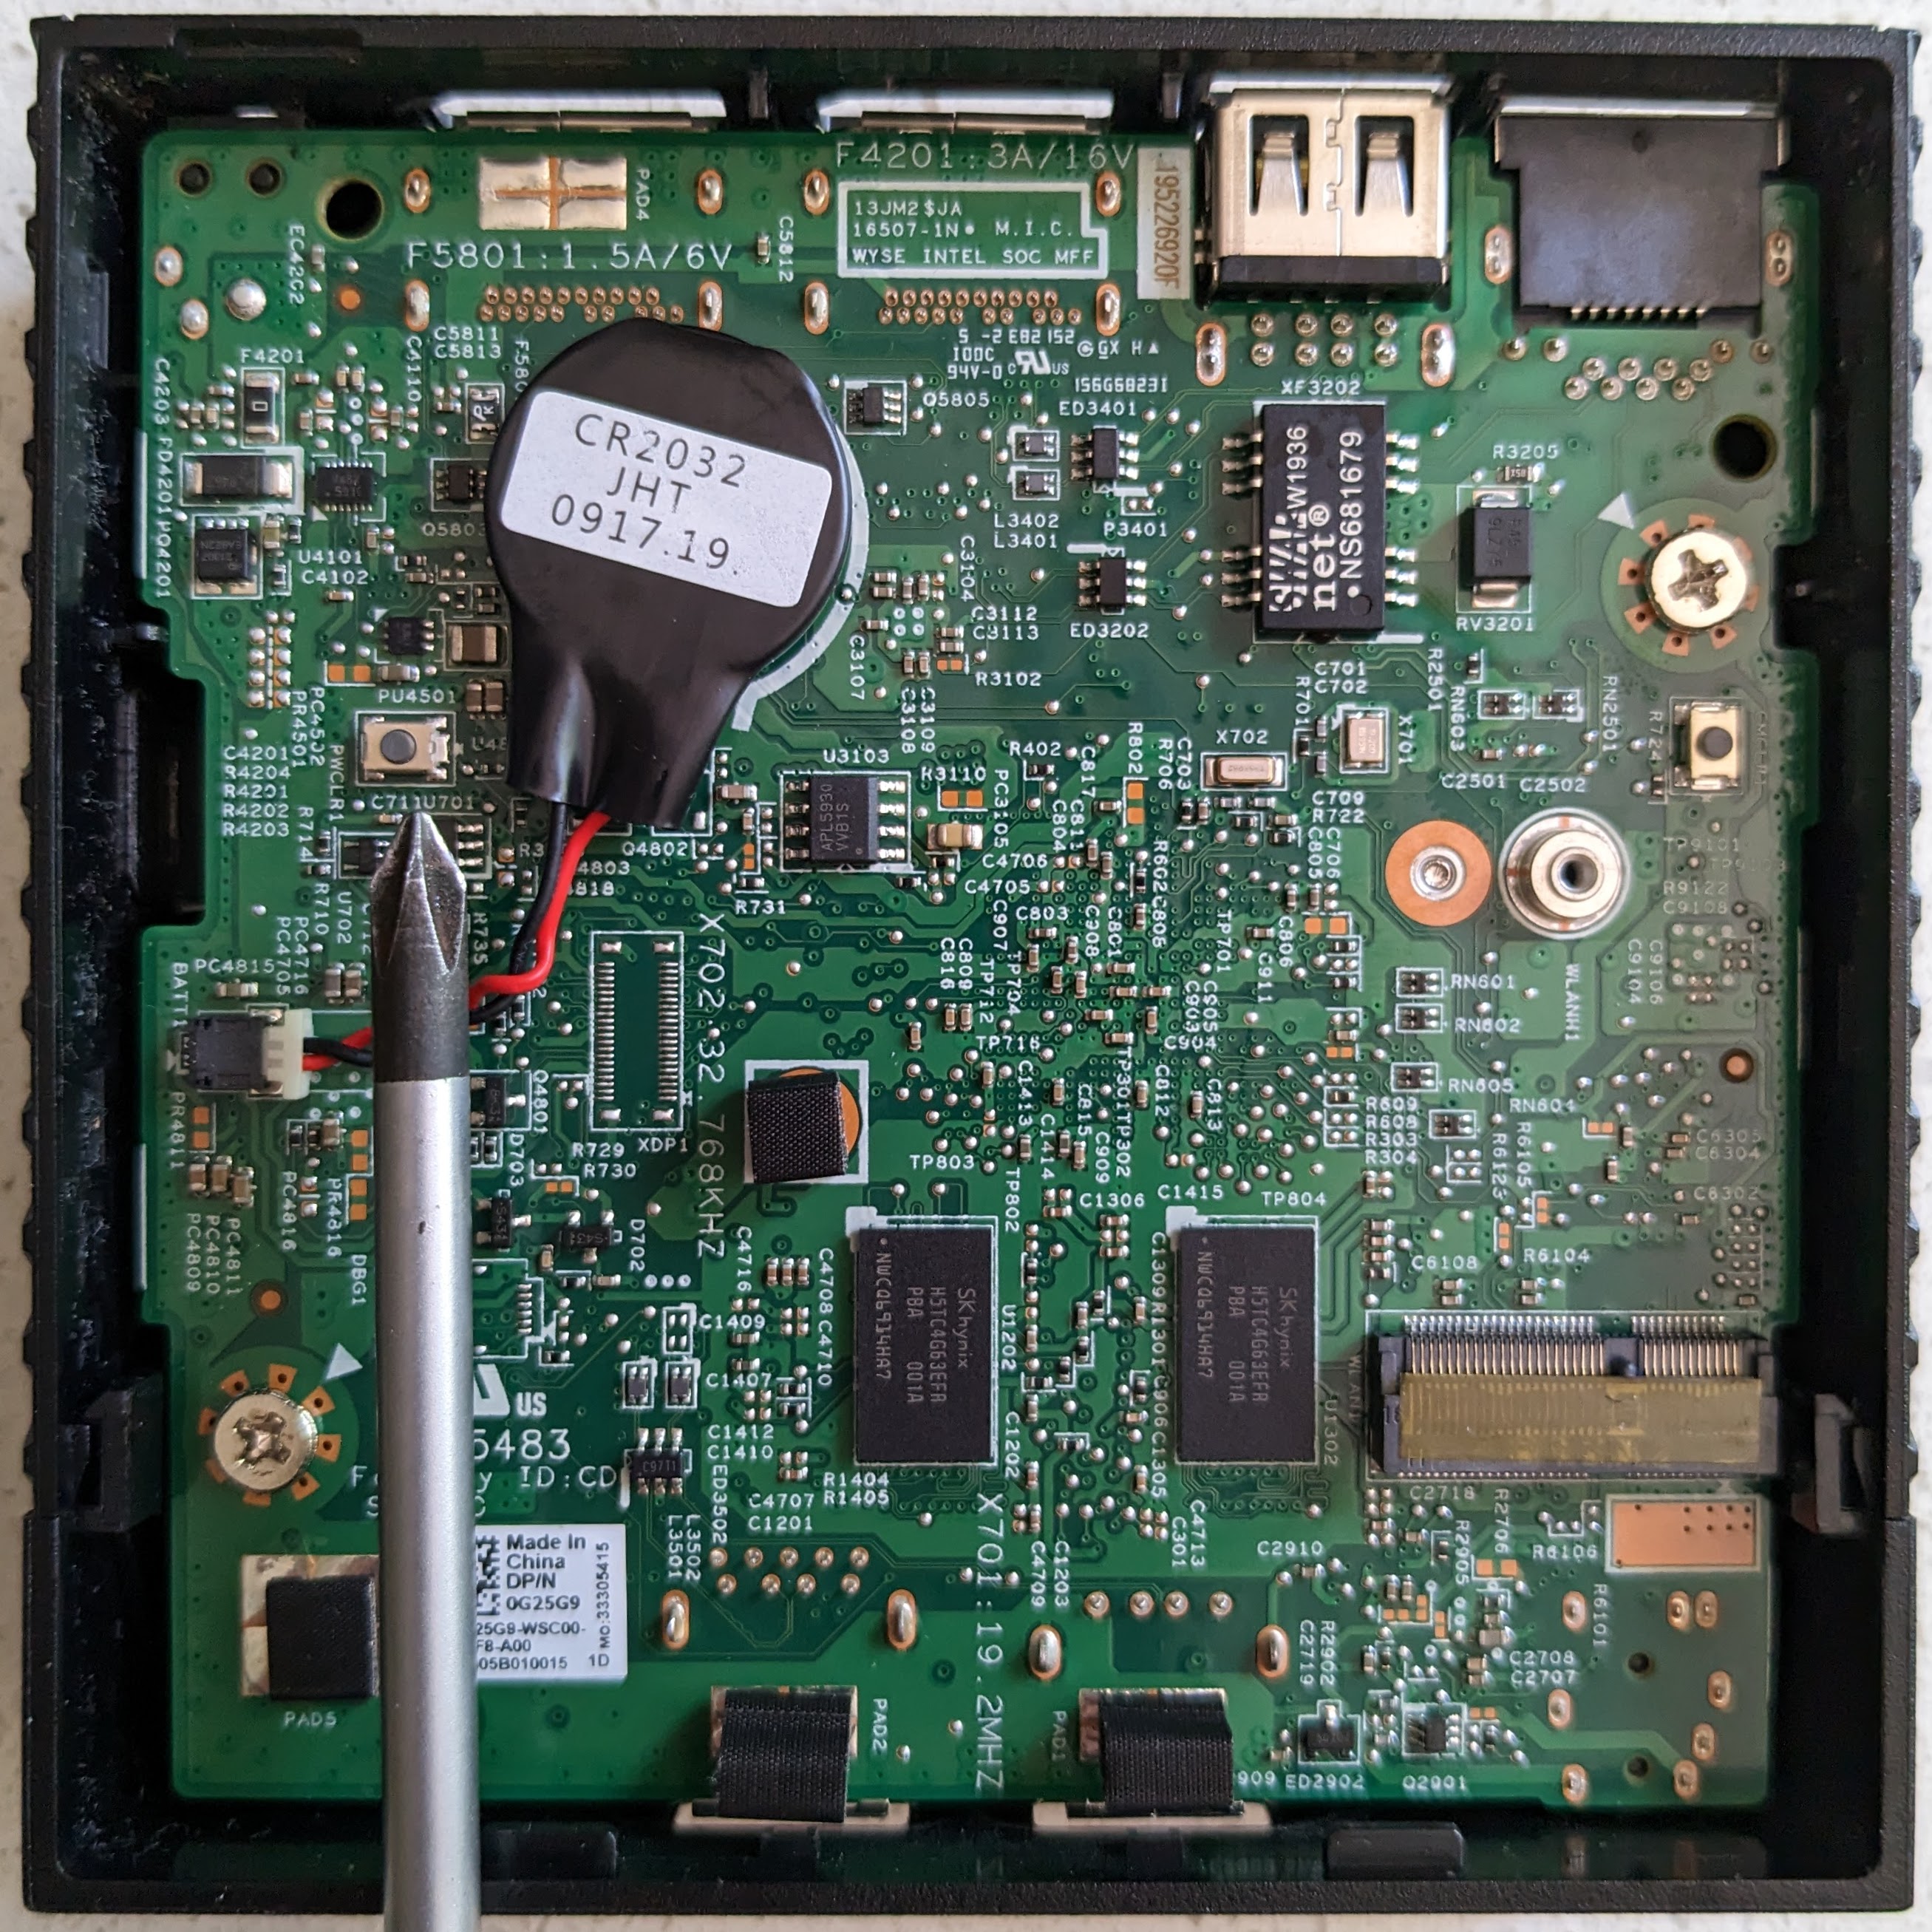 |
| The BIOS password reset button |
With the power removed, press and hold this button, then apply power. The unit should boot into a "password reset" mode (and you can release the button) and show a notice on the screen when the task is complete. Then you should be able to power-cycle again and boot into BIOS mode without the need for a password.

Step 2: Install an OS
So while I said the "end goal" is to be running "something like OpenWRT", just to get started I'm going to install a general Linux OS to see how things work.
I'm using Fedora 38 Server partially because it's what I'm most familiar with, and partially because it's got a new enough kernel to include drivers for the wireless dongle I want to use.
I usually use the insanely cool Ventoy software so I have a single USB boot device with a stack of OS install media on it. When you have your USB boot media attached, power-on the 3040 and press F12 repeatedly until you get to the UEFI boot menu and then select your USB boot target (If you're using Ventoy, select your target install image).
 |
| Booting to USB target from UEFI menu |

| My Ventoy boot menu |
Caveat #2: Text mode only installs (for now)
I noticed some sort of bug in the graphical install environment where something was failing and de-referencing a null object in Python later on. If you install using text mode, this problem is not experienced. I might have a look at trying to isolate and fix this problem in the future, but I make no promises. Note that there's nothing stopping you from installing a graphical OS, the 3040's work fine with a Linux GUI, it's just that the graphical installer has some issues.
For Ubuntu, text-mode install is still pretty available, but it's been hidden for Fedora installs now. To install Fedora in text-based installation mode, you need to pause the GRUB boot process and edit the boot command line to add the string parameter "inst.text" to the end of the line (Meaning "install in text mode").

When you boot the installer, it'll prompt you to start a VNC network display or just proceed in the limited textual environment (you want the text-mode install).

Caveat #3: Wipe disk and don't use LVM
I experienced some hiccups in the installer if the inbuilt 8G /dev/mmcblk0 device had any existing partitions when the install target selection happened. To get around this, when the OS had booted to the state where virtual terminals were running (i.e when the text/vnc option was presented), I switched to another terminal and wiped the disk structures with dd if=/dev/zero of=/dev/mmcblk0 bs=1M count=4; partprobe (Or you could use your own preferred method for doing this). If you don't get this done early enough in the boot, the target-selection may fail. In which case you shouldat least have wiped the disk and can just reboot into the installer and try target selection again. You could boot into some other live OS first (like GParted or CloneZilla) to do the disk-wipe too.
Another issue with the target disk is that it seems to fail if you try to use LVM volumes. I found that "plain" volumes were more reliable.
Caveat #4: Probably need a manual power-cycle after install
Generally I've found the reboot/power-off and ACPI behaviour to be a bit flaky on the 3040 sometimes. I can't fully quantify the behaviour, but one thing that seems to stand out is after the initial OS install, the device doesn't properly power-off or reboot automatically. Basically if you try to poweroff or reboot the device, it'll do the OS shut-down, but just sit there with a blank screen at the end without actually powering-off or rebooting (The caps-lock key still works, but the OS doesn't seem to respond at all). To get around this I either lean on the power button for several seconds or power-cycle the box. Once the OS is installed and a package-update run, it seems to be able to do this all automatically again (at least most of the time).
End of part one
OK, so that's a basic Fedora OS install. Next I'll detail my dealings with using the Comfast USB WiFi dongle with OpenWRT and then finally how I'll get "something like OpenWRT" running on this box.
UPDATES:
I've added the later posts:
I found out through the Hackaday comments the "parkytowers.me.uk" website with a lot more info about the boards (and many, MANY other thin clients). There's also some detail about using the M.2 SDIO slot with an SD card adapter board (Sadly it looks like there are "issues" with Linux here).
Also through Hackaday was discovery of the MrChromebox firmware (For ChromeOS devices, of course)
No comments:
Post a Comment
Note: Only a member of this blog may post a comment.